Pro Tip: How to Quickly add Instagram Tags to Your Photos on iPhone

I'm a big fan of automating repetitive and boring tasks.
Being a programmer, I'm able to script just about anything to save me lots of time.
And my Instagram account is no exception (I don't use any scripting in this case, though).
While I don't automate post scheduling because I like to add a current mood to the photo via filters, I do automate adding a photo description, which usually took me most of the time to create.
You for sure have seen Instagram photos with tens of tags underneath.
I don't know about you, but I hate typing them. More so, when they are repetitive for most of my previous pictures (since I only post food and travel pics).
I was looking for a way to quickly add them without manually typing and ended up using the iPhone's Notes app at first.
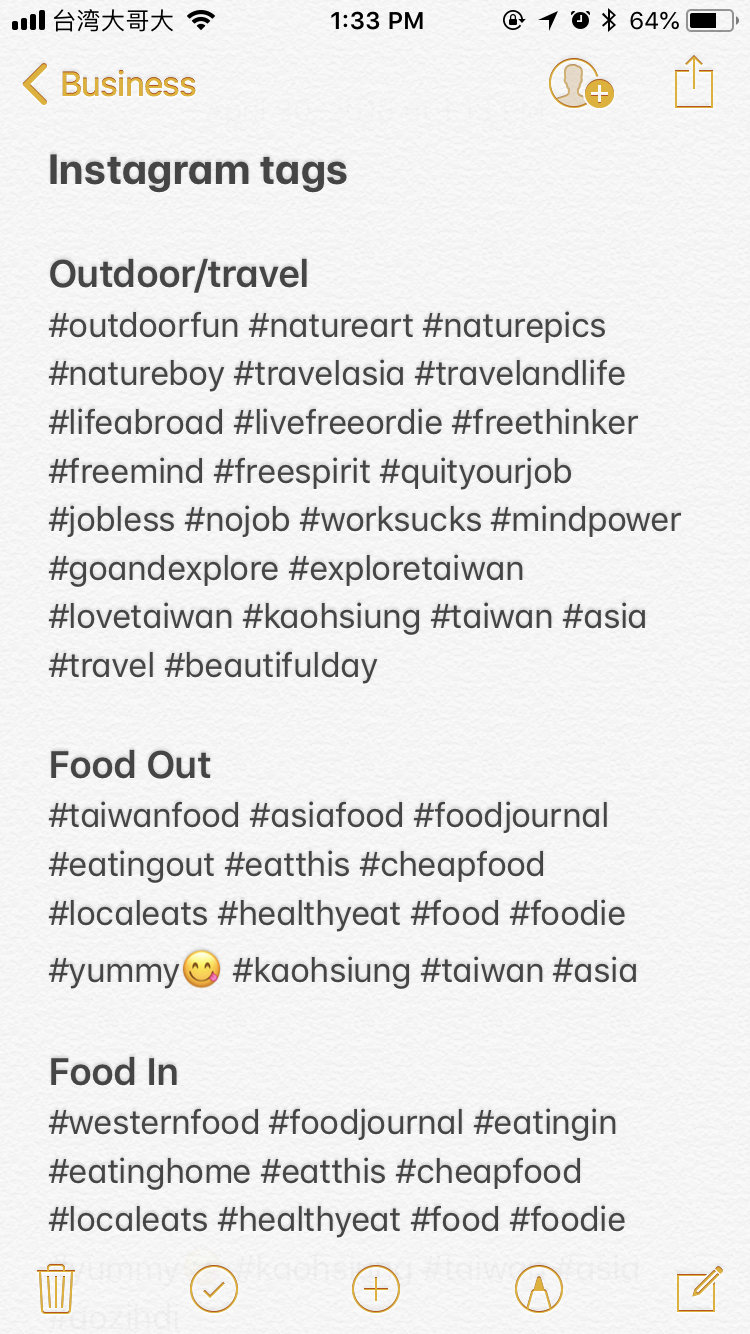
While it does the job, you'll have to switch to the app, select the tags (and I really hate the way you select text on iPhone), copy it, switch back to Instagram and paste it.
That's like millions of clicks which is the exact opposite of what you're trying to achieve.
After hating my Instagram experience to death, I realized that I've been using a built-in tool on iPhone to replace "mdg" to "mariodian (at) gmail (dot) com" (without the spam bot protection of course) for years.
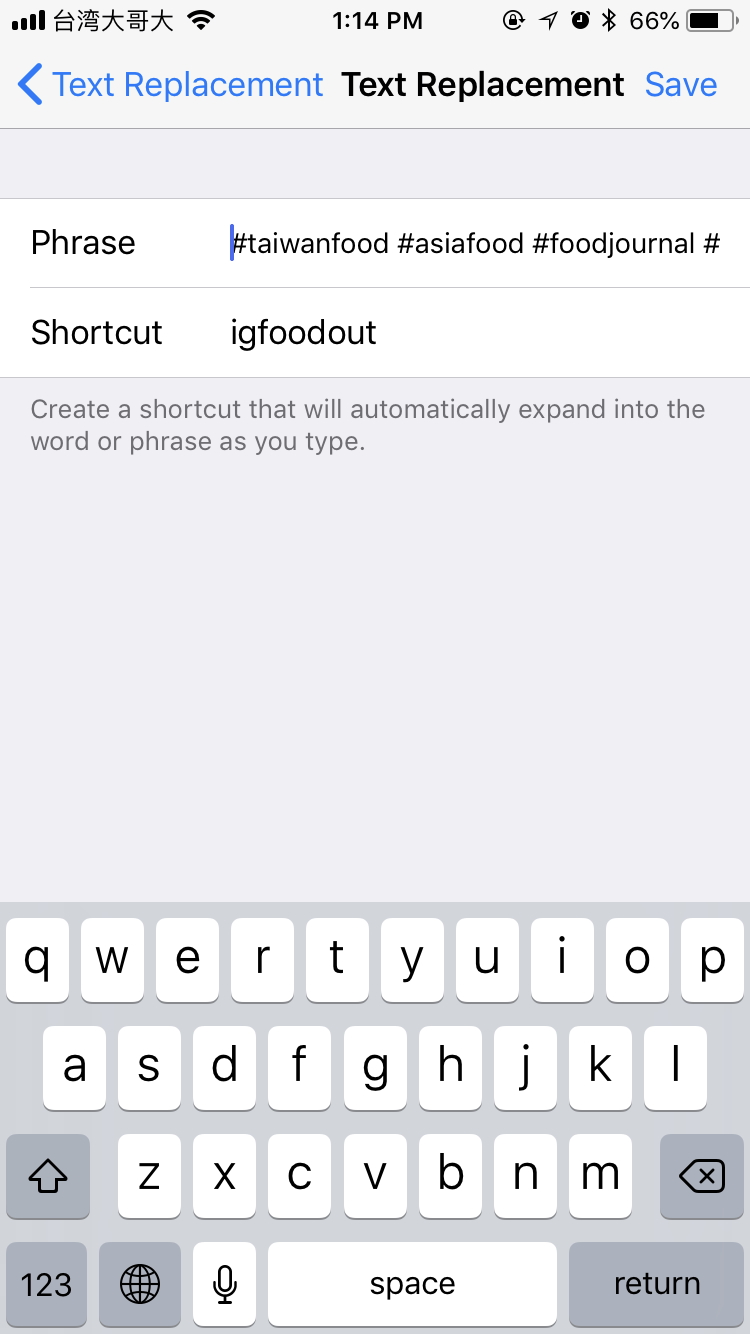
It's called Text Replacement and is for some weird reason hidden deep inside the Settings menu.
You can find it by going to Settings -> General -> Keyboard -> Text Replacement.
Click the + button and start adding the tags.
Eventually, you'll end up with a list of your most common Instagram tags that you may easily add to your posts.

When you're ready to post a new photo, go to the Instagram app, add a cool photo of yours and in the Caption field, start typing "ig" followed by the desired keyword, in my case "igfoodout".
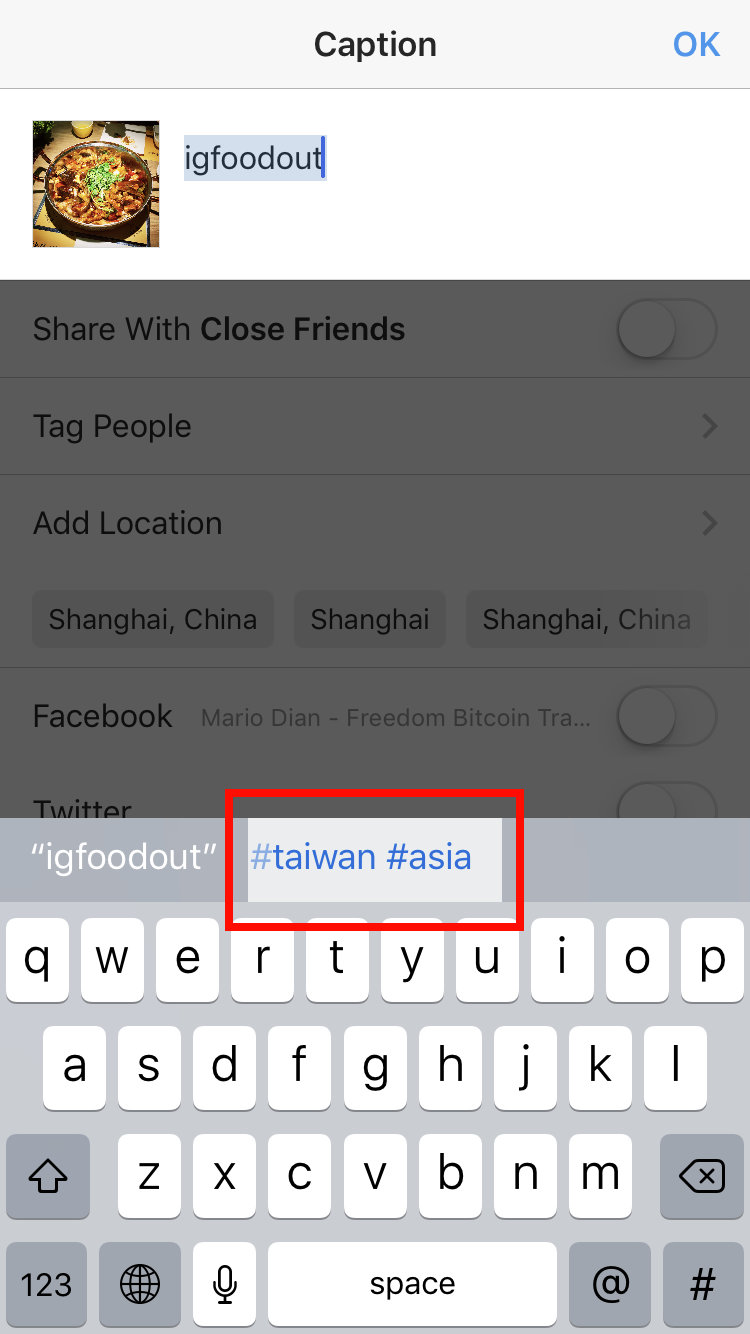
The keyboard will replace the keyword with the list of your tags. Just click it and it will add it to the text field.
Add tags specific to the photo and publish.
You now saved yourself some minutes that you can instead use on perfecting the photo with filters.
I hope you find this short tutorial useful.